|
Pintech Practice Cymbal: Crash/Splash (10" - 16")
Simple, single-zone, non-chokable
For this conversion, I used:
(1) 10/14/16" Pintech Practice Cymbal - $13
(3) 2" Diameter Piezo Element - 75 cents each
(1) 1/4" Stereo Jack - 30 cents each
(1) Roll of electrical tape
(1) Small 4mm Black Wire-Tie
(1) Roll of 5mm foam tape (should be about 1.5" wide)
(1) Glue gun with glue (optional, helps jack to stay in place)
Instructions:
1) Lay out the three piezos evenly around the cymbal. See the pic to get the proper idea. The quarter inch jack can be
placed anywhere, but keep in mind you need to have enough wire to reach each piezo.
2) Solder the three piezos in parallel to the jack. Remember, the head of the piezo goes to the sleeve, and ring of the
piezo goes to the tip. You should take note of this because, if soldered the other way around, you'd have to change each bow
instrument sound to an edge in your module.
3) Warm up the glue gun for step 4 if you decided to use glue. Wherever you decided to put your jack, drill two holes
big enough for the wire tie on either side of the jack. Thread the wire-tie through the holes and around the jack, then tighten
with pliers, and cut off the excess.
4) (Optional) Squeeze some hot glue between the jack and the cymbal. Don't be afraid to use a lot, you'd be surprised
what it takes to keep the jack from falling off.
5) Tape over the jack to hide the messiness. Now, cut 3 squares of 5mm foam tape and place them between each piezo and
the cymbal.
6) Use the electrical tape to cover each piezo (as I've partially done in the photo), and tape the wires down.
7) Congrats, you're done!
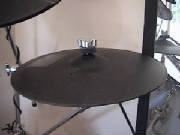
Splash
Follow the same instructions above. The splash will look like this when done.

Underneath are three piezos evenly spaced from each other. Hide these with tape, paint, or just about anything which adheres
to plastic.
|

I helped the jack to stay secure with some hot glue. Rather messy job is covered with electrical tape.
|

The black wire-tie will look like this on the top of the cymbal.
|
<-- Cymbals
|


